If you’re dealing with a damp basement, you’re not alone. Many homeowners face moisture issues that can lead to mold growth and structural damage. Fortunately, there are effective DIY methods to tackle this problem right from the inside. From evaluating the cause of moisture to applying a waterproofing sealant, each step plays an essential role in safeguarding your space. Ready to explore the best strategies for a dry, secure basement? Let’s get started.
Key Takeaways
- Inspect for leaks and moisture sources, including pipes, foundations, and windows, to determine necessary repairs before waterproofing.
- Clean walls using a stiff brush and a vinegar-water solution to remove dirt, mold, and loose paint for effective preparation.
- Apply a high-quality waterproofing sealant evenly with a brush or roller, following manufacturer instructions for optimal results.
- Consider installing an interior drainage system, like French drains, to divert moisture away from walls and prevent water pooling.
- Schedule regular maintenance checks to monitor humidity levels and inspect for cracks or mold to maintain a waterproof environment.
Assessing the Cause of Moisture
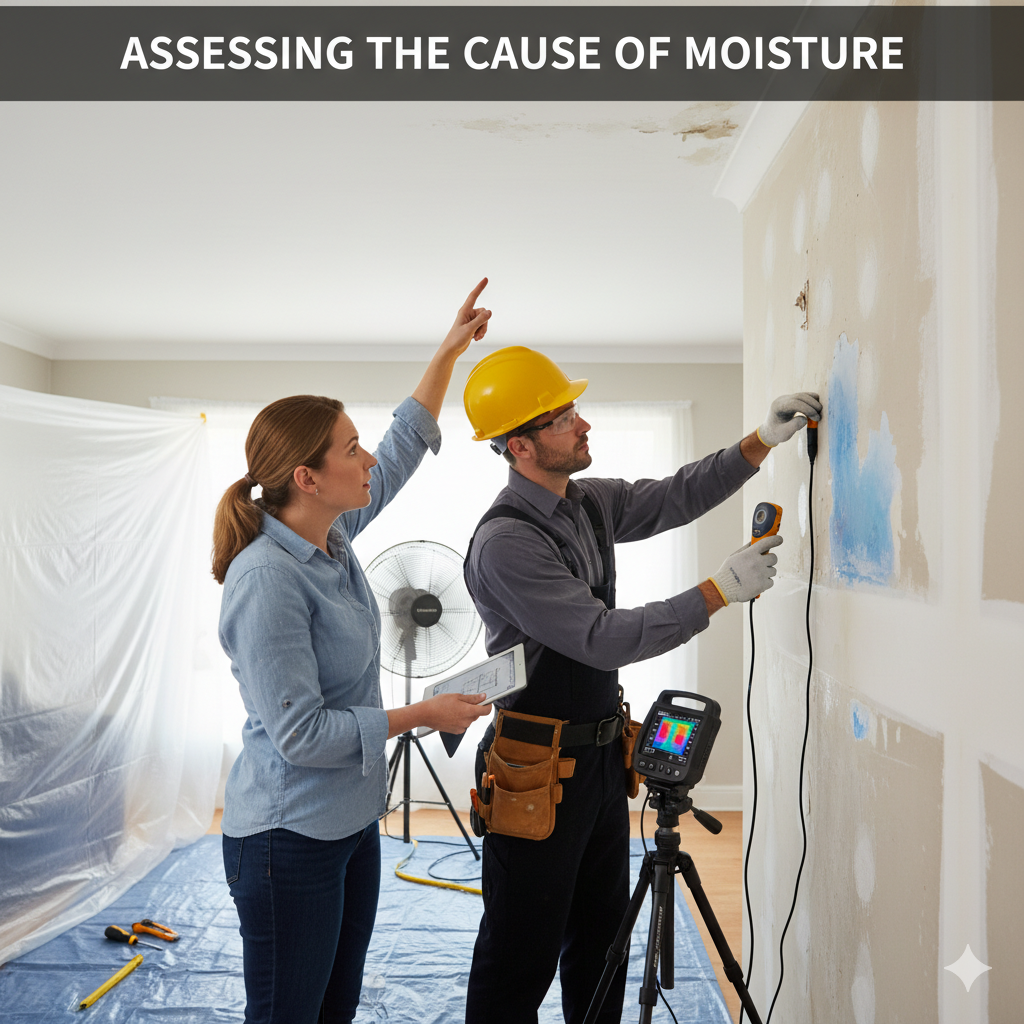
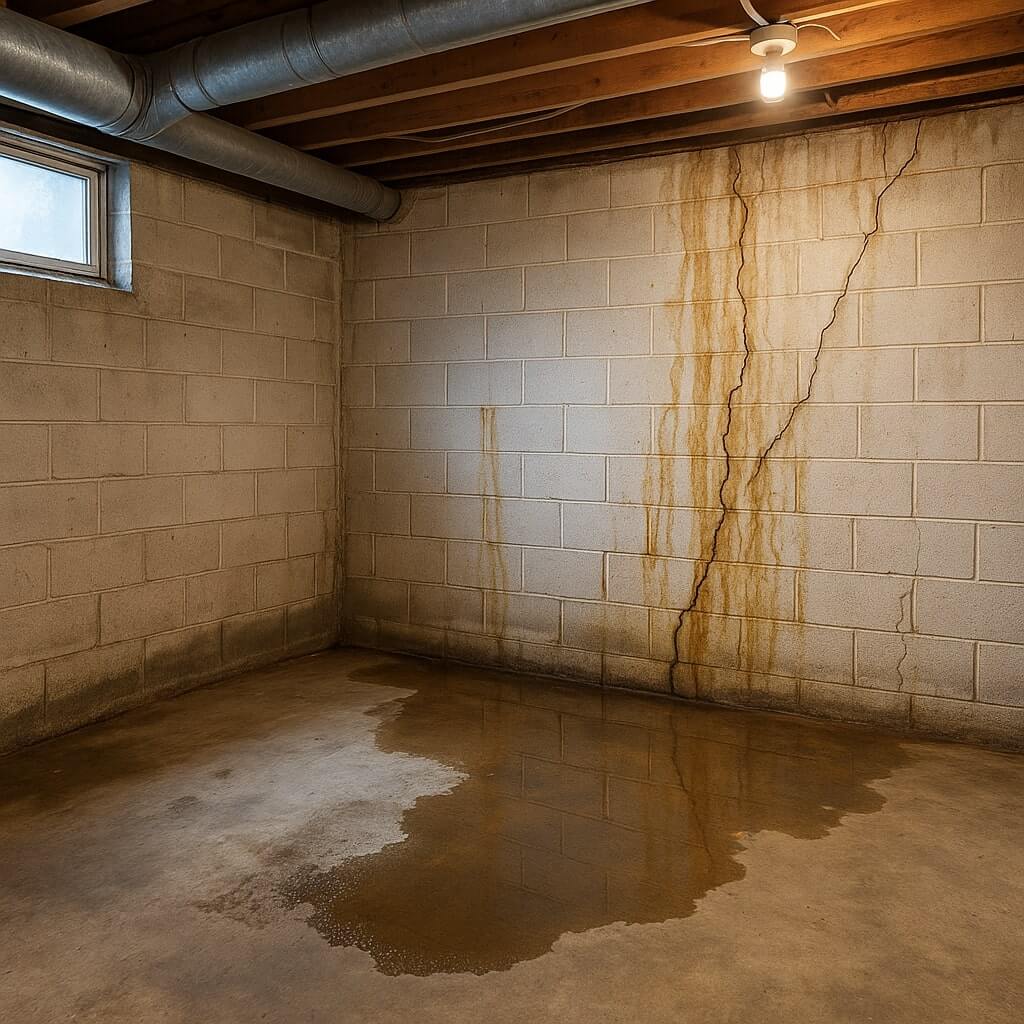
How can you effectively determine the source of moisture in your basement? Start by checking for moisture sources like leaks from pipes, foundations, or windows.
Next, monitor humidity levels; use a hygrometer to measure the air’s moisture content. If humidity levels exceed 60%, condensation might be your culprit.
Monitor your humidity levels with a hygrometer; if they surpass 60%, condensation could be causing your moisture issues.
Inspect the exterior drainage and gutters—clogged systems can lead to water pooling near your foundation.
Look for damp patches or mold growth on walls and floors, as these can signal persistent moisture issues.
Identifying these factors will help you tackle the problem effectively before proceeding with any waterproofing solutions.
Cleaning and Preparing the Walls
Now that you’ve pinpointed the source of moisture in your basement, it’s time to tackle the cleaning and preparing of the walls for waterproofing.
Start by identifying your wall types—concrete, block, or drywall—as each requires different cleaning methods. Use a stiff brush to remove dirt, mold, and loose paint.
For tougher stains, a mixture of water and vinegar or a specialized cleaner can help. Once cleaned, allow the walls to dry completely.
This surface preparation is essential, as any remaining moisture or debris can hinder the effectiveness of your waterproofing efforts.
You’re one step closer to a dry basement!
Applying a Waterproofing Sealant
Once you’ve guaranteed the walls are clean and dry, it’s time to apply a waterproofing sealant that will protect your basement from future moisture issues.
Begin your sealant application by choosing a high-quality product designed for interior use. Using a brush or roller, apply the sealant evenly, ensuring complete coverage of every surface.
Follow the manufacturer’s instructions for drying times and application techniques. Consider using multiple coats for enhanced protection.
This waterproofing technique not only seals the walls but also creates a barrier against dampness.
With patience and precision, your basement will stay dry and comfortable for years to come.
Using Interior Drainage Systems
When it comes to keeping your basement dry, using an interior drainage system can be a game-changer.
You’ll find various types of systems available, and understanding their installation process is key to success.
Plus, regular maintenance and monitoring will help guarantee your drainage system works effectively over time.
Types of Drainage Systems
Choosing the right type of interior drainage system can make all the difference in keeping your basement dry and free from water damage.
There are various drainage types to evaluate, such as French drains, which direct water away from walls, and interior perimeter drains that collect water and channel it to a sump pump.
You might also explore waterproof mats that help divert moisture. Each drainage solution has its benefits, so assess your basement’s unique needs.
Installation Process Overview
Having a reliable interior drainage system is just the beginning of your waterproofing journey; the installation process is where the real work happens.
You’ll need to focus on effective installation techniques and make thoughtful material selections to guarantee long-lasting results.
Follow these steps for a successful installation:
- Prepare the area: Clear debris and moisture from the basement walls and floor.
- Choose the right materials: Opt for durable, waterproof materials like PVC pipes and sump pumps.
- Install the drainage system: Follow your chosen method, guaranteeing proper slope for efficient water flow.
With these steps, you’ll be well on your way to a dry basement!
Maintenance and Monitoring Tips
To keep your interior drainage system functioning effectively, regular maintenance and monitoring are essential.
Start by checking the system monthly for clogs or debris; clear any blockages you find. Verify your sump pump operates well by testing it regularly—just pour water into the pit to see if it activates.
For humidity control, consider using a dehumidifier to keep moisture levels in check. Additionally, perform water testing every few months to check for leaks or rising water levels.
Installing a Vapor Barrier
When moisture seeps through your basement walls, installing a vapor barrier can be a game changer in preventing water damage.
Here are some key vapor barrier types and installation techniques to take into account:
- Plastic Sheeting: The most common type, easy to install and affordable.
- Foam Board: Offers additional insulation while blocking moisture; ideal for basement walls.
- Spray-On Barriers: Provides a seamless application, perfect for irregular surfaces but requires more expertise.
Utilizing Sump Pumps
A sump pump is your best ally in keeping a dry basement. To verify it works effectively, focus on proper sump pump selection. Choose a pump with enough horsepower to handle your basement’s size and potential water influx.
Once you’ve selected your pump, the next step is sump pump installation. Set it up in a designated sump pit, ideally at the lowest point of your basement. Make sure to connect it to a discharge pipe that routes water away from your home.
Regularly test your pump to confirm it’s functioning well, helping you prevent water damage before it starts.
Adding Insulation for Extra Protection
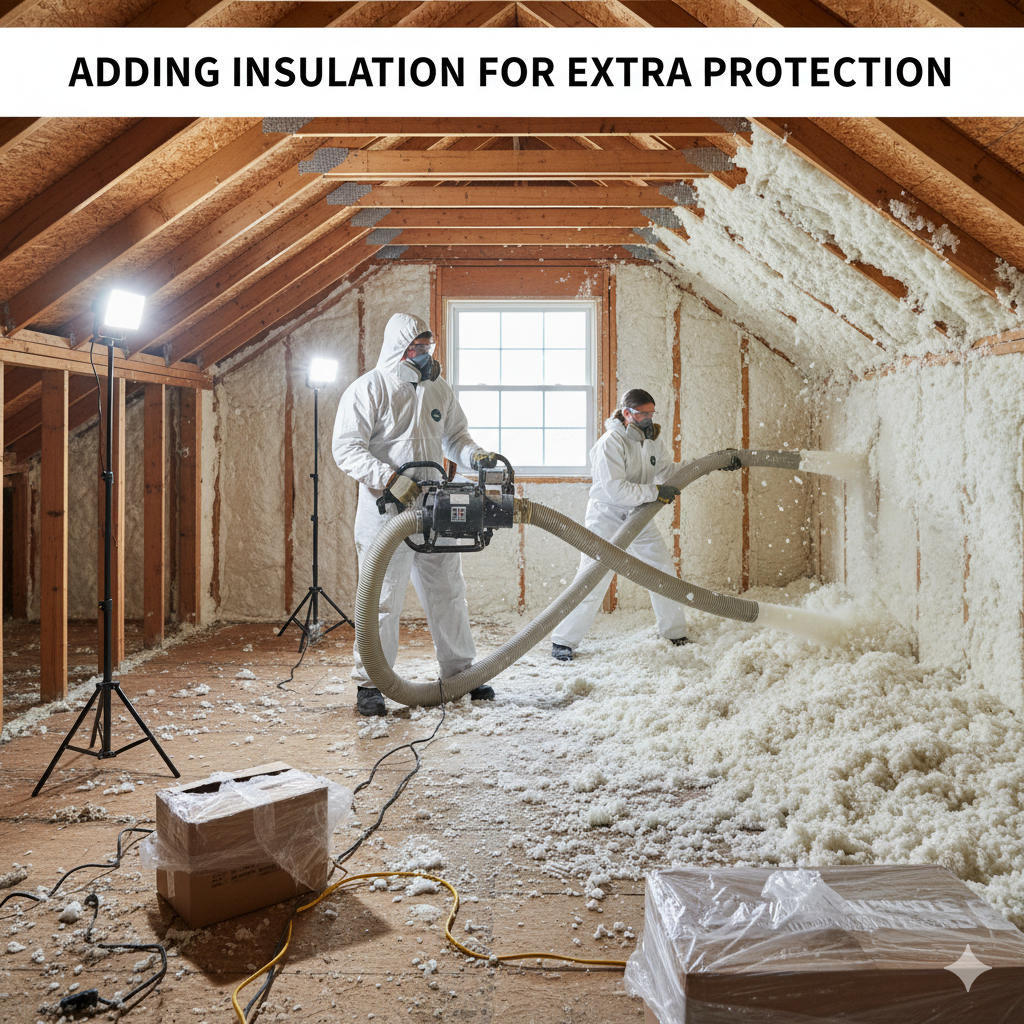
Insulating your basement walls can greatly enhance waterproofing efforts and improve energy efficiency. By adding insulation, you create a barrier that helps keep moisture out while maintaining a comfortable temperature.
Insulating your basement enhances waterproofing and energy efficiency, creating a moisture-resistant barrier for a comfortable home.
Consider these insulation materials:
- Foam board: Rigid panels provide excellent insulation and moisture resistance.
- Spray foam: Expands to fill gaps, sealing out water and air leaks.
- Fiberglass batts: Cost-effective and easy to install, but verify proper vapor barriers are in place.
Choosing the right insulation not only protects your basement but also contributes to lower energy bills, making it a smart investment for your home.
Regular Maintenance and Monitoring
Even with proper insulation in place, maintaining your basement’s waterproofing requires regular upkeep.
Schedule routine inspections every few months to catch potential issues early. Check for cracks in the walls, signs of mold, or any damp spots.
Use moisture detection tools to monitor humidity levels; this can help you identify hidden leaks. If you notice anything unusual, address it immediately to prevent further damage.
Remember, it’s easier and more cost-effective to maintain your basement than to deal with a major repair later.
Stay proactive, and your basement will remain a dry, usable space for years to come.
Conclusion
By following these DIY methods to waterproof your basement walls, you can effectively combat moisture and protect your home. Start by identifying the moisture source, then clean and seal your walls. Consider adding drainage systems and a vapor barrier for extra protection. Don’t forget to keep an eye on your basement’s condition with regular maintenance. Taking these steps not only enhances the comfort of your space but also safeguards your investment for years to come.